techwirepro.com
Introduction
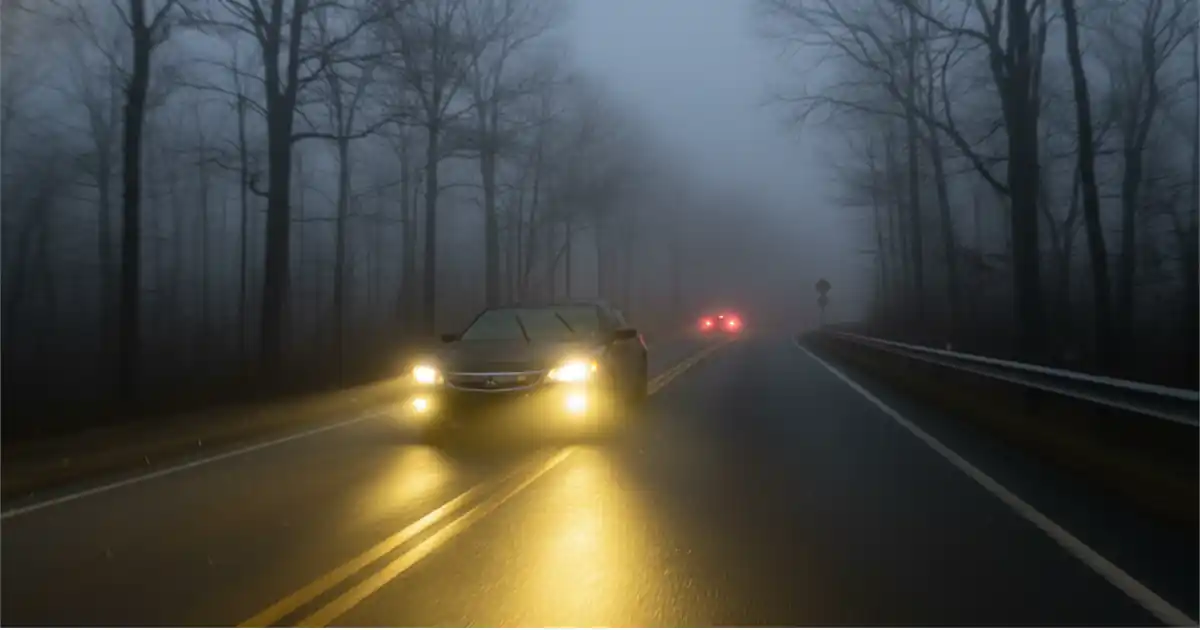
Driving in thick fog can quickly turn dangerous. That’s why many drivers search for how to wire fog lights in Honda vehicles safely and correctly. This Honda fog light wiring guide explains the process in easy steps so you can install lights without damaging your vehicle’s electrical system.
Fog lights sit lower than headlights. They shine light onto the road surface rather than upward. This design reduces glare and helps drivers see lane markings clearly. Because of this advantage, many owners follow a Honda fog light installation tutorial to upgrade their vehicle lighting system.
What Are Fog Lights?
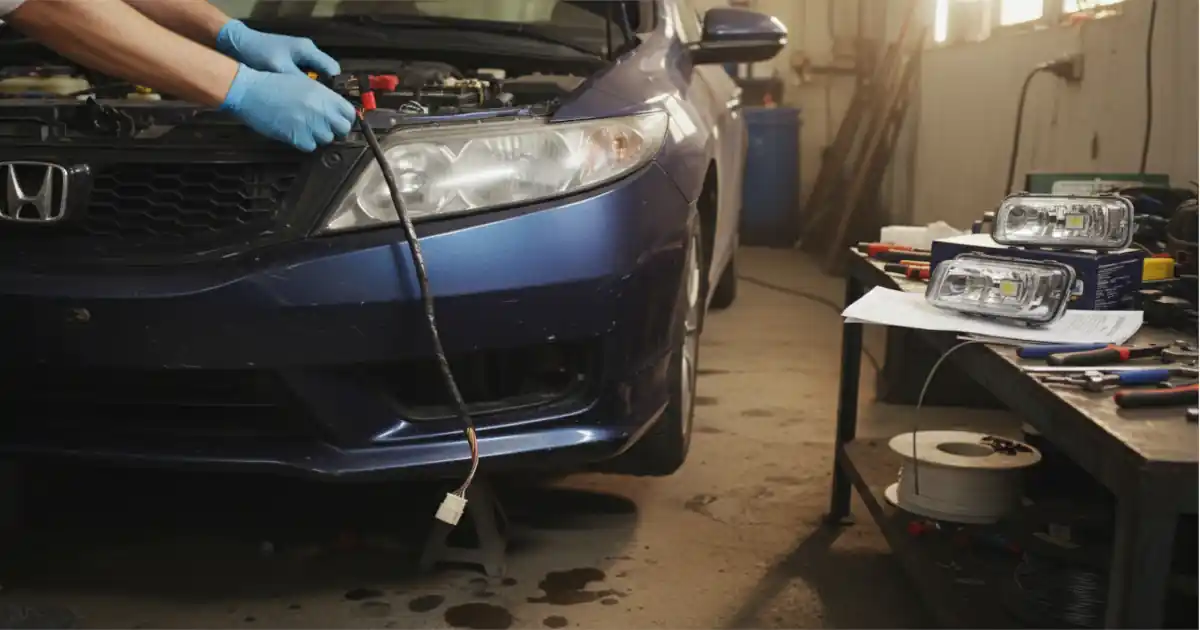
Fog lights are specialized lamps designed for low-visibility conditions. Unlike headlights, they produce a wide beam that spreads close to the ground. Drivers often install them while learning to wire fog lights in Honda vehicles because the upgrade improves road visibility in fog, rain, or snow.
The beam pattern prevents light from bouncing back into the driver’s eyes. Modern vehicles often include LED fog light installation options. Many mechanics also follow a car fog light installation guide or an auxiliary lights wiring guide when installing new fog lights.
ALSO READ: How to Stay Always Updated with TXEPC Site
Why Fog Lights Are Important for Honda Vehicles
Honda vehicles already offer reliable lighting. However, poor weather conditions still reduce visibility. Installing fog lights improves road safety and helps drivers see the road edges more clearly. Many mechanics rely on a Honda Tech fog light wiring guide to properly install the system.
Fog lights also help make nighttime highway travel safer. They help drivers detect road signs earlier. According to automotive lighting studies, proper fog lights can improve near-road visibility by nearly 25 percent. That’s why many owners follow DIY Honda fog light wiring instructions to upgrade their cars.
When You Should Install Fog Lights
Drivers usually install fog lights when they frequently travel in foggy or rainy areas. Mountain highways and coastal roads often have poor visibility. Learning how to wire fog lights in Honda vehicles becomes useful in those conditions because the upgrade increases safety.
Another reason is upgrading older vehicles that never included factory fog lights. Many drivers choose Honda OEM fog light wiring for factory-style installation. Others install modern LED options through a car fog light installation guide to improve brightness and efficiency.
Tools and Materials Needed to Wire Fog Lights
Before starting installation, gather all required tools and electrical parts. A proper Honda fog light wiring guide always emphasizes preparation because missing components can interrupt the installation process and damage wires.
Most installations require common automotive tools. The table below shows typical equipment needed during a Honda fog light installation tutorial.
| Screwdriver set | Remove bumper covers or trim panels |
| Wire stripper | Prepare wiring for connections |
| Crimping tool | Secure electrical connectors |
| Multimeter |
Test voltage in 12V fog light wiring
|
| Zip ties | Organize wiring harness |
Electrical parts are also important. Most fog light kits include a harness, relay, fuse, and switch. These components ensure stable current flow in the Honda fog light wiring diagram. A proper harness simplifies the installation of the Honda fog light harness and protects the electrical circuit.
Basic Tools Required
Basic tools make installation faster and safer. Screwdrivers help access bumper panels where fog lights mount. Wire strippers prepare clean copper ends for connections. Mechanics also use multimeters to test voltage before connecting the battery.
A good installation also includes cable protection. Heat-resistant sleeves protect wires near the engine from damage. These simple steps support a safe DIY Honda fog light wiring process and help beginners follow Honda fog light wiring instructions without electrical problems.
Fog Light Wiring Kit and Components
Most fog light kits contain essential electrical components. These include a wiring harness, relay, fuse holder, switch, and mounting brackets. Together, they create a safe Honda fog light wiring step-by-step system.
A universal kit also works for many vehicles. However, factory kits often match the vehicle wiring connectors. This makes Honda OEM fog light wiring easier and reduces installation time. Some modern kits even support LED fog light wiring for Honda vehicles, providing brighter output.
Safety Tips Before Starting the Installation
Electrical work requires careful preparation. Disconnecting the battery should always be the first step. This prevents short circuits during the installation of 12V fog light wiring.
Another important tip is to inspect the vehicle’s wiring diagram. A correct automotive lighting wiring diagram helps identify proper power sources. Following proper Honda fog light wiring instructions protects sensitive electronics and ensures long-term reliability.
Honda Tech: How to Wire Fog Lights Step by Step
The most common question drivers ask is how to wire fog lights correctly in Honda vehicles. The process involves mounting lights, connecting the wiring harness, installing the relay, and testing the circuit.
A typical installation follows a structured sequence. Mechanics often reference a Honda fog light wiring diagram during installation. This ensures that the power supply, switch, and relay connections match the vehicle’s electrical system.
Mount the Fog Lights on the Bumper
Start by installing the fog lights in the bumper openings. Many Honda vehicles already include mounting slots behind the bumper cover. Secure the lights with brackets and ensure proper alignment.
Correct positioning improves light spread across the road surface. Many installers check alignment before continuing the Honda fog light installation tutorial because misaligned lights reduce visibility.
Connect the Wiring Harness
Next, connect the fog light harness to each lamp. The harness routes wires from the lights to the engine compartment, where power connections are available.
Most kits simplify fog light harness installation with color-coded wires. Following the Honda fog light wiring step-by-step process prevents confusion and ensures proper current flow through the circuit.
Install the Relay and Fuse
Relays protect the electrical system by controlling high current flow. During installation, connect the relay between the battery and the fog lights. This creates a safe battery to power the fog light wiring.
A fuse must also be installed. The fuse protects the circuit from overload. In most systems, a 15-amp fuse supports standard 12V fog light wiring used in automotive lighting systems.
Connect the Fog Light Switch
The switch controls when the fog lights turn on. Many Honda vehicles include blank switch panels inside the dashboard. Installing the switch there keeps the system looking factory.
The switch connects to the relay through control wires. This fog light switch relay wiring activates the relay when the driver presses the switch.
Connect the Power Wire to the Battery
The next step is to connect the main power wire to the battery. This wire supplies electricity to the relay and lighting system.
Always use a fuse between the battery and the relay. The fog light fuse connection protects the wiring from overheating. A proper connection ensures reliable compliance with Honda fog light wiring instructions.
Ground the Fog Lights Properly
Ground wires complete the electrical circuit. Without proper grounding, fog lights may flicker or fail completely.
Attach the ground wire to a clean metal surface on the vehicle frame. This step is essential in DIY Honda fog light wiring because poor grounding causes many electrical problems.
Test the Fog Light Connection
After installation, reconnect the battery and test the lights. Turn on the ignition and press the fog light switch.
If installed correctly, the lights should activate instantly. This final step confirms that the Honda fog light wiring installation, step by step, works correctly and safely.
Understanding the Honda Fog Light Wiring Diagram
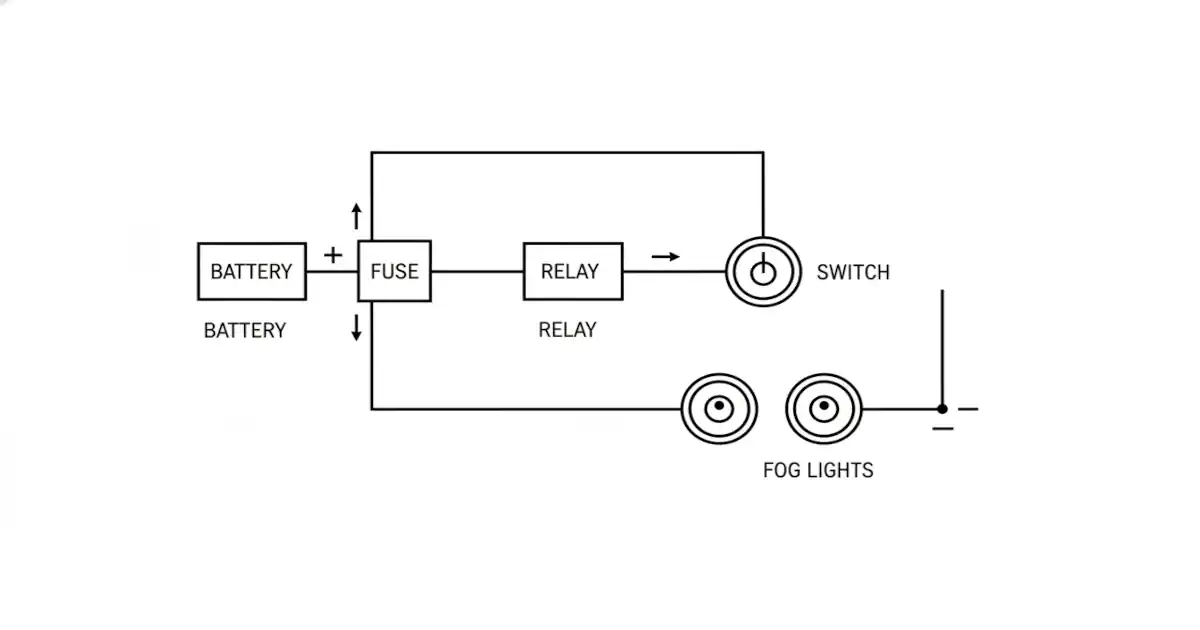
A wiring diagram shows how electricity flows through the lighting system. It explains the connection between the battery, relay, fuse, switch, and fog lights. Learning this diagram simplifies wiring fog lights in Honda vehicles.
The diagram below represents a simplified fog light circuit.
| Battery | Supplies electrical power |
| Fuse | Protects circuit from overload |
| Relay | Controls high current flow |
| Switch | Activates the relay |
| Fog Lights | Produce illumination |
Understanding these connections helps drivers follow Honda fog light wiring instructions without mistakes.
Relay Wiring Explained
Relays act like electronic switches. They allow low current from the dashboard switch to control high current from the battery.
This setup protects the vehicle wiring system. Many installers study a fog light relay wiring diagram or an automotive relay wiring diagram before wiring fog lights with a relay.
Fuse and Power Connection
The fuse protects the electrical system from overload. If the current becomes too high, the fuse melts and stops power flow.
A proper connection of the fog light fuse prevents damage to the wires. Most 12V fog light wiring circuits use a fuse between 10 and 20 amps, depending on the bulb type.
Switch Wiring Guide
The switch sends a signal to activate the relay. When the driver presses the switch, the relay connects battery power to the lights.
Correct fog light switch relay wiring ensures the lights operate only when intended. Many installers rely on a clear automotive lighting wiring diagram to properly connect switch terminals.
Installing Aftermarket Fog Lights on a Honda
Some vehicles do not include factory fog lights. In that case, drivers install aftermarket lighting systems. Learning to wire fog lights in Honda vehicles is essential when installing these upgrades.
Aftermarket lights often include LED technology for improved brightness. Many enthusiasts install them using LED fog lights, wiring Honda guides, and universal wiring kits.
OEM vs Aftermarket Fog Lights
Factory fog lights match the vehicle design perfectly. They integrate with original wiring connectors and switches. Many drivers prefer Honda OEM fog light wiring for this reason.
Aftermarket lights provide more options. They often include stronger LED units and custom designs. However, installers must follow the aftermarket fog light wiring procedures provided by Honda carefully to ensure compatibility.
Using a Universal Fog Light Wiring Kit
Universal kits simplify the installation process. They usually include a relay, a fuse holder, a switch, and a wiring harness.
Most installers follow universal fog light wiring kit installation instructions to connect the lights correctly. These kits also simplify installing aftermarket fog lights in Honda vehicles without modifying factory wiring.
Tips for Clean and Safe Installation
Professional installers keep wiring hidden and protected. They route wires along factory harness paths to avoid heat and moving parts.
Using protective sleeves and clips improves reliability. These practices make fog light harness installation safer and extend the life of the lighting system.
ALSO READ: Internet Hicks: Understanding Rural Voices in the Digital World
Common Honda Fog Light Wiring Problems
Even well-installed systems may develop electrical issues. Understanding these problems helps drivers quickly diagnose faults when learning to wire fog lights in Honda vehicles.
Many lighting failures occur because of loose wires or blown fuses. Identifying these faults early prevents larger electrical problems.
Fog Lights Not Turning On
Sometimes drivers notice that their Honda fog lights aren’t working. This often occurs due to wiring errors or a disconnected power source.
Checking the switch and relay connections usually solves the issue. Following proper Honda fog light wiring instructions helps prevent these problems.
Blown Fuse or Faulty Relay
A blown fuse stops power flow to the fog lights. This is one of the most common Honda fog light wiring problems drivers encounter.
A failed relay can also prevent lights from turning on. If the fog light relay is not working, replacing the relay usually restores normal operation.
Loose Ground Wire Issues
Poor grounding can cause flickering or dim lights. Many drivers discover this when diagnosing blown Honda fog light fuse electrical issues.
Cleaning the ground connection usually fixes the problem. Ensuring a secure ground is essential in any DIY Honda fog light wiring project.
Honda Fog Light Installation for Popular Models
Different Honda models have slightly different wiring layouts. However, the overall process for wiring fog lights in Honda vehicles remains largely the same.
Understanding model-specific setups makes installation easier. Many guides focus on the Civic, Accord, and CR-V because they are the most common Honda vehicles.
Honda Civic Fog Light Wiring Guide
The Civic remains one of the most popular cars in the United States. Many owners search for how to wire fog lights on the Honda Civic because older trims lack factory fog lights. A typical Honda Civic fog light wiring setup uses a relay and a dashboard switch, both connected through the vehicle’s fuse box. The process closely follows the standard Honda fog light wiring guide.
Honda Accord Fog Light Installation
The Accord includes pre-installed mounting points for fog lights in many models. This simplifies Honda Accord fog light installation for owners upgrading their lighting system.
Installers usually connect the lights using factory connectors and follow the official Honda fog light installation tutorial to complete the wiring safely.
Honda CR-V Fog Light Setup
The CR-V often includes wiring paths inside the bumper assembly. This design simplifies installations of the Honda CR-V fog light wiring guide.
Many CR-V owners also upgrade to LED lighting. Following a clear car fog light installation guide ensures safe wiring and improved nighttime visibility.